How to create Table Extension in visual studio code?
by Pearl
This Blog explains creating new fields in existing table using Table Extension.
Table Extension are used to extend the existing tables such as creating new fields, renaming, etc.
To create table extension, first you need to create separate folder for your project in visual studio code.
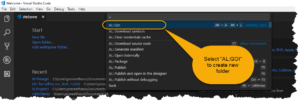
Open the Visual Studio Code
Press “Ctrl+Shift+P” to get the Commands
From the Commands select “AL: Go!” to create a new folder
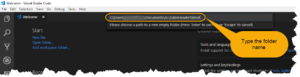
Type the folder name at the end of your file path and then press Enter
You will get your the folder in Explorer
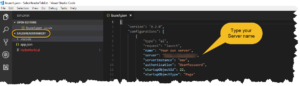
Enter your server name in json file
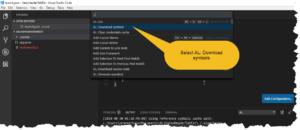
Click on the “Ctrl+Shift+P” to get the commands
From the commands select the “AL: Download symbols” to download symbols. Symbols which contain all the default object in Business Central (such as Tables, Pages, Codeunits, Reports, Queries, XMLPorts, and Menusuits)
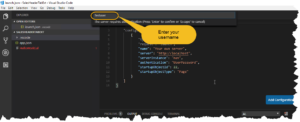
Enter your Username and then press enter
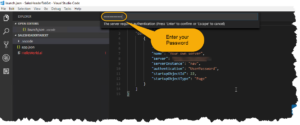
Enter your password and then press enter
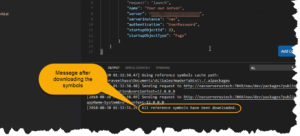
Once it is downloaded successfully, you will get the following message in your output screen
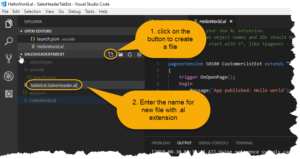
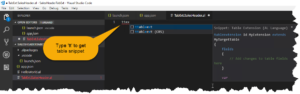
Create a new file inside the folder with .al extension
Type “tte” to get the Snippet commands of table.
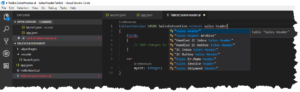
From that command select the “ttableext” to get the Snippet of table extension
This is the snippet for table extension
Enter the Extension ID, Extension Name, and the Target table name as an existing table name
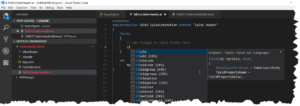
Type “tf” to get the list of snippets
Select the “tfield” to get the field snippet
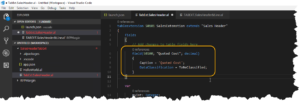
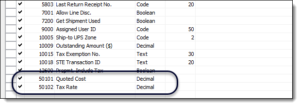
Type the Field ID, Field Name, Datatype of the new filed
Inside that field add an optional Caption name. For our example:
Caption = ‘Quoted Cost’;
By following this procedure you can create as many fields as you want in a table
To build the extension press “Ctrl+Shift+B”
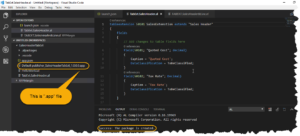
Once the Build process is completed successfully you will get Successmessage in your output screen
The corresponding .app will be saved to the folder you created in step 4